Aug 20, 2026Buying Guides
How to Use Pull Up Bands: Assisted Pull Up Guide for Beginners
Learn how to use bands for pull ups, choose the right assistance level, avoid common mistakes, and follow a 4-week beginner pull up band plan
How to Use Pull Up Bands: Assisted Pull Up Guide for Beginners
Pull-ups are one of the most effective bodyweight exercises for developing the back, arms, shoulders and grip, but they can also be difficult for beginners.
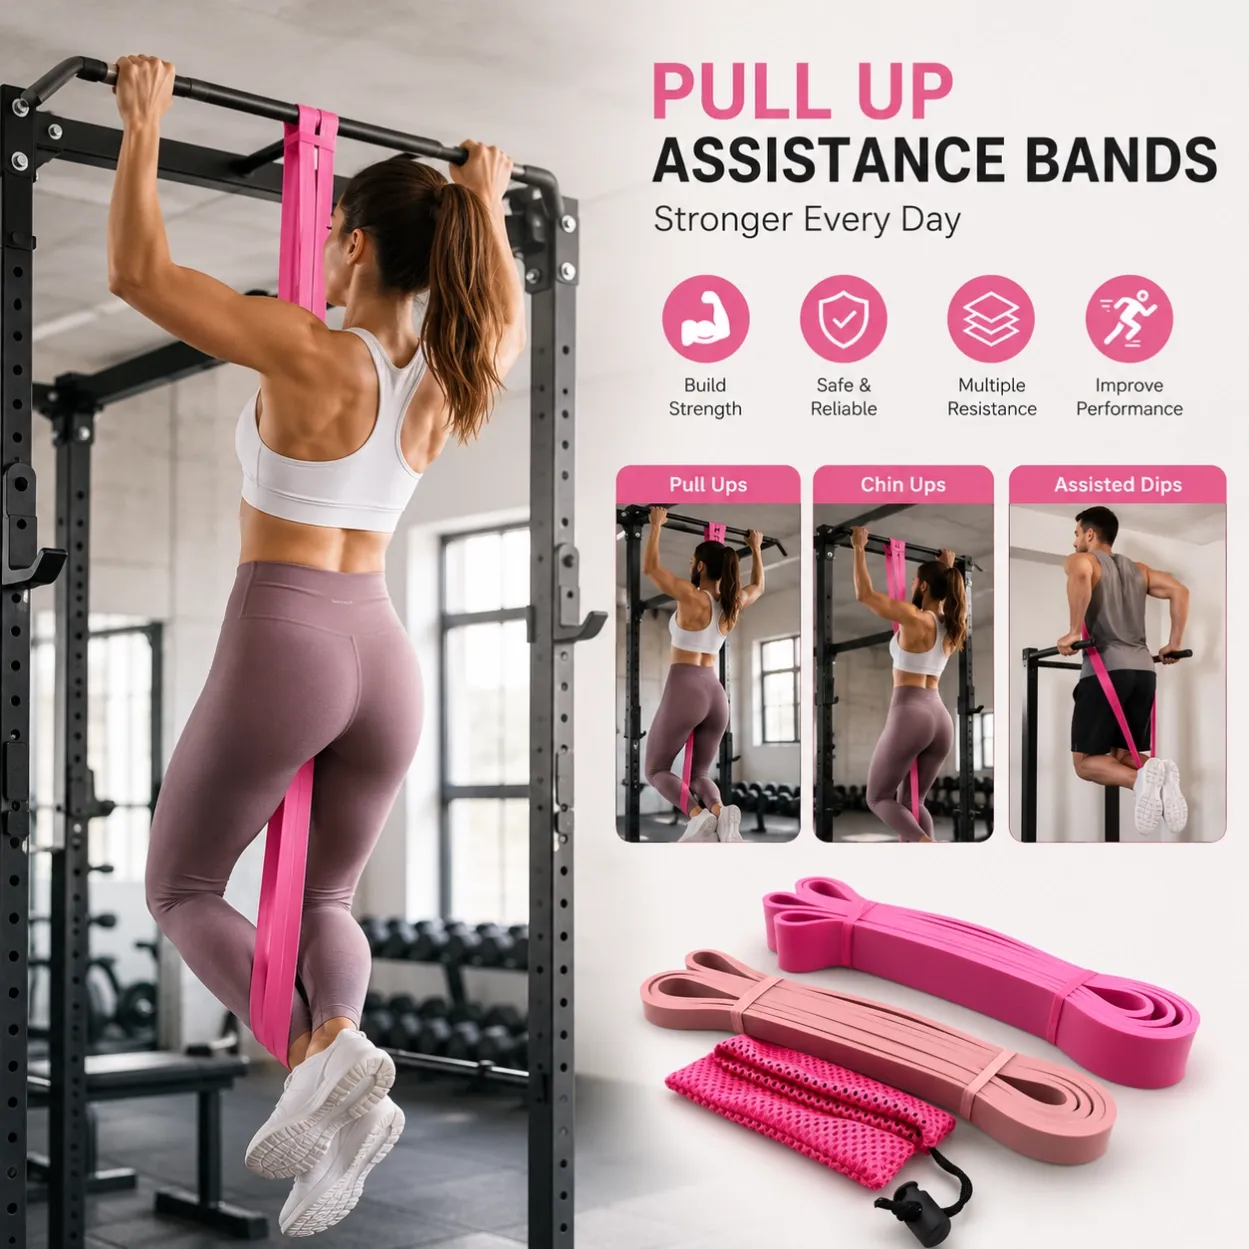
Pull up assistance bands make the movement more accessible by supporting part of your body weight. Instead of shortening the range of motion, the band allows you to practice the complete pull-up movement while gradually building the strength required for unassisted repetitions.
If you are wondering how to use bands for pull ups, the basic method is simple: secure a continuous-loop resistance band around a stable pull-up bar, place your knee or foot into the loop, and perform the pull-up while the stretched band provides upward assistance.
This guide explains how pull up bands for beginners work, three common band setups, how to choose resistance, and how to progress over four weeks.
What Are Pull Up Bands?
Pull up bands are long, continuous-loop resistance bands commonly made from natural latex. Unlike short mini loops used around the thighs, pull-up bands are long enough to stretch from a pull-up bar toward the user's knees or feet.
When stretched, the band generates elastic tension.
During an assisted pull-up, that tension provides upward assistance and reduces the amount of body weight you need to lift.
How Do Pull Up Assistance Bands Work?
The basic principle is:
More band tension = more assistance
A heavier or wider band generally provides more assistance, while a lighter band provides less.
This makes resistance bands particularly useful for progressive pull-up training.
A beginner might start with a heavier band and gradually move toward:
Heavy Band → Medium Band → Light Band → Unassisted Pull Up
The goal is not simply to perform more band-assisted repetitions forever. The goal is to gradually reduce assistance as your pulling strength improves.
How to Use Bands for Pull Ups
Before starting, make sure the pull-up bar is stable and the resistance band is in good condition.
Secure the band to the bar using a looped attachment around the bar according to the band's intended setup. Pull downward carefully to confirm that it is securely positioned before putting your body weight into it.
There are three common ways to use the band.
Method 1: Single Knee in the Band
This is one of the easiest setups for beginners to control.
How to Set It Up
- Secure the pull-up band around a stable pull-up bar.
- Pull the hanging loop downward.
- Carefully place one knee inside the loop.
- Keep the other leg relaxed or slightly bent.
- Grip the pull-up bar.
- Start from a controlled hanging position.
- Pull your body upward until you reach your intended range of motion.
- Lower yourself slowly back to the starting position.
Why Use the Single-Knee Method?
The knee position is relatively easy to enter and exit, making it practical for beginners.
It also avoids placing the band directly under the shoe.
Best for: beginners, technique practice and moderate assistance.
Method 2: One or Both Feet in the Band
Placing a foot into the band generally stretches it farther than a knee setup, which can change the assistance profile.
How to Set It Up
Secure the band to the pull-up bar and carefully stretch it downward.
Place one foot into the loop. Depending on the band, setup, and intended training method, some users may position both feet with appropriate control.
Keep the body stable and perform the pull-up without swinging.
Why Use the Foot Method?
Because the band is stretched farther, it can provide substantial assistance at the bottom of the movement.
However, users need to be especially careful when entering and exiting the band. A stretched resistance band stores elastic energy and should never be released suddenly.
Best for: users who need greater assistance and can safely control the setup.
Method 3: Double-Knee Assisted Pull Up
Another option is positioning both knees into an appropriately sized band loop.
How to Do It
- Attach the band securely to the bar.
- Pull the band down under control.
- Position both knees into the loop.
- Maintain a stable lower-body position.
- Perform controlled pull-ups.
- Remove the knees carefully before releasing band tension.
Using both knees can feel more symmetrical than a single-knee setup.
Best for: beginners who prefer a balanced lower-body position.
Which Pull Up Band Resistance Should a Beginner Use?
There is no single resistance level that works for everyone.
The correct band depends on:
- Body weight
- Current upper-body strength
- Number of unassisted pull-ups
- Band dimensions
- Stretch distance
- Training goal
This is why pull up bands for beginners are often sold as multi-resistance sets rather than as one universal band.
Pull Up Band Resistance Selection Guide
Training Level | Suggested Assistance | Training Goal |
|---|---|---|
Cannot initiate a pull-up | Heavy / Extra Heavy | Learn full movement |
Can pull partially upward | Medium–Heavy | Develop pulling strength |
Can perform 1–3 pull-ups | Medium | Increase training volume |
Can perform 4–8 pull-ups | Light–Medium | Technique and additional reps |
Can perform 8+ pull-ups | Light | Warm-up or volume work |
These are general categories rather than universal pound ratings because resistance values vary by band dimensions, stretch distance and manufacturer.
A Simple Test
Choose a band that allows you to perform approximately 5–8 controlled assisted repetitions without excessive swinging or losing technique.
If you can easily perform 15–20 repetitions, the assistance may be too high for strength-focused progression.
If you cannot perform several controlled repetitions, try a stronger assistance band.
4-Week Pull Up Bands for Beginners Program
A beginner program should gradually improve movement quality and strength rather than simply chasing more repetitions.
Here is a simple four-week progression.
Week 1: Learn the Movement
Use enough assistance to maintain control.
Assisted Pull Ups: 3 × 5
Slow Negative Pull Ups: 3 × 3
Banded Rows: 3 × 10
Focus on keeping the shoulders controlled and avoiding excessive swinging.
Week 2: Increase Repetitions
Keep the same band if necessary.
Assisted Pull Ups: 3 × 6–8
Slow Negative Pull Ups: 3 × 3–5
Banded Rows: 3 × 12
The goal is to increase total quality repetitions.
Week 3: Reduce Assistance
If you can complete all Week 2 repetitions with good technique, move to a slightly lighter band.
Assisted Pull Ups: 4 × 5–6
Negative Pull Ups: 3 × 4
Banded Rows: 3 × 10–12
Do not move to a lighter band if doing so significantly reduces your range of motion.
Week 4: Transition Toward Unassisted Pull Ups
Begin the session by attempting an unassisted repetition while fresh.
Then continue with the band.
Unassisted Pull Up Attempt: 1–3 controlled attempts
Light/Medium Assisted Pull Ups: 4 × 5
Negative Pull Ups: 3 × 3
Banded Rows: 3 × 12
At the end of four weeks, reassess your strength.
Some beginners may be ready for lighter assistance, while others should repeat part of the program. Progress depends on starting strength, body weight, training frequency and recovery.
Muscles Worked During Band-Assisted Pull Ups
Using a resistance band does not fundamentally change the purpose of the pull-up. It reduces the effective load while allowing the user to practice the pulling pattern.
Major muscles involved include:
Latissimus Dorsi
The lats are major contributors to pulling the upper arms toward the body.
Biceps
The elbow flexors help bend the arms during the upward phase.
Upper and Mid Back
Muscles around the shoulder blades contribute to scapular control and pulling mechanics.
Forearms and Grip
The hands and forearms maintain the grip on the bar.
Core
The trunk helps stabilize the body and limit unnecessary swinging.
This is one reason assisted pull-ups can be useful for beginners: they allow these muscle groups to practice working together through the movement.
Common Mistakes When Using Pull Up Bands
1. Choosing Too Much Assistance
A very heavy band may make the exercise easy but can reduce the amount of work performed by the user.
Use enough assistance to maintain proper technique, then progressively reduce it.
2. Progressing to a Lighter Band Too Quickly
Reducing assistance is useful only when you can maintain a controlled range of motion.
Do not sacrifice technique just to say you are using a lighter band.
3. Swinging the Body
Avoid turning assisted pull-ups into a swinging movement.
Keep your trunk controlled and focus on deliberate pulling.
4. Releasing a Stretched Band Suddenly
A resistance band stores energy when stretched.
Always remove your knee or foot carefully and control the band as it returns toward its resting length.
5. Using a Damaged Band
Do not train with a band showing:
- Cracks
- Cuts
- Tears
- Significant discoloration or degradation
- Damaged edges
- Permanent deformation
Replace damaged bands rather than continuing to use them.
6. Ignoring the Attachment Point
The band should be attached only to a stable pull-up bar or another structure suitable for the intended load.
Check the setup before every training session.
How Often Should Beginners Practice Assisted Pull Ups?
For many beginners, 2–3 pull-up-focused sessions per week can provide opportunities to practice the movement while allowing recovery between sessions.
A simple schedule might look like:
Monday: Assisted pull-up training
Wednesday: Rest or other training
Friday: Assisted pull-up training
Sunday: Optional light technique session
More is not automatically better.
Training quality, gradual progression and adequate recovery are important parts of improving pull-up performance.
How to Progress From Bands to Your First Pull Up
The simplest progression strategy is to reduce assistance gradually.
Stage 1 — Heavy Assistance
Learn the complete movement and build confidence.
Stage 2 — Medium Assistance
Increase the amount of body weight you lift yourself.
Stage 3 — Light Assistance
Use the band primarily to help through the hardest portion of the movement.
Stage 4 — Controlled Negatives
Start near the top and lower yourself slowly without band assistance when appropriate.
Stage 5 — First Unassisted Pull Up
Attempt unassisted repetitions while fresh, then use the band to complete the remaining training volume.
This makes pull up bands for beginners a progression tool rather than a permanent substitute for bodyweight pull-ups.
Pull Up Band Care and Maintenance
Proper storage and inspection can help maintain the condition of natural latex resistance bands.
Keep Bands Clean
After training, wipe the band with a soft damp cloth when necessary and allow it to dry before storage.
Avoid aggressive cleaners unless they are specifically suitable for the band material.
Avoid Excessive Heat and Direct Sunlight
Natural latex can degrade when repeatedly exposed to high temperatures and UV light.
Store bands in a cool, dry place away from prolonged direct sunlight.
Keep Away From Sharp Objects
Do not allow bands to rub against sharp metal edges or rough surfaces that may cut or damage the latex.
Inspect Before Every Workout
Check the area that contacts the pull-up bar as well as the rest of the loop.
If you find cracking, tearing or significant damage, stop using the band.
Pull Up Band Safety Tips
Resistance bands are simple equipment, but they should still be used carefully.
Always:
- Inspect the band before training.
- Use a stable pull-up bar.
- Make sure the band is securely attached.
- Enter and exit the stretched band under control.
- Keep your face away from the direct path of a stretched band.
- Do not intentionally overstretch the band beyond its intended use.
- Replace damaged or heavily worn bands.
For children, rehabilitation users, or people returning to exercise after injury, appropriate professional supervision may be advisable.
FAQ: How to Use Pull Up Bands
How do you use bands for pull ups?
To learn how to use bands for pull ups, secure a continuous-loop band around a stable pull-up bar, place a knee or foot into the hanging loop, and perform the pull-up while the stretched band provides upward assistance. Always enter and exit the band under control.
Are pull up bands good for beginners?
Yes. Pull up bands for beginners allow users to practice the full pulling movement with reduced effective load. As strength improves, users can gradually progress to lighter assistance.
Should I put my knee or foot in a pull up band?
Both setups can be used. A knee-in-band setup is often easier for beginners to control, while placing a foot in the band stretches it farther and may provide a different level of assistance.
How do I know which resistance band to use for pull ups?
Choose a resistance level that lets you complete several full, controlled repetitions. If the movement is extremely easy, reduce assistance. If you cannot maintain your intended range of motion, increase assistance.
How many assisted pull ups should a beginner do?
A practical starting point is around 3 sets of 5 controlled repetitions, adjusting the band and volume according to your ability.
When should I move to a lighter pull up band?
Move to a lighter band when you can consistently complete your target repetitions with controlled technique and the current assistance no longer feels sufficiently challenging.
Can pull up bands help me get my first pull up?
They can be part of an effective progression. Combine assisted repetitions with appropriate pulling exercises and gradually reduce band assistance as strength improves.
Can I use pull up bands for exercises other than pull ups?
Yes. Long loop bands can also be used for exercises such as rows, assisted dips, mobility work, stretching and selected upper- and lower-body resistance exercises.
From Assisted Pull Ups to Unassisted Reps
Learning how to use bands for pull ups is ultimately about progression.
Start with enough assistance to perform the movement correctly. Build repetitions and control. Then gradually reduce assistance until you can perform more of the movement using your own strength.
For most beginners, the progression looks like:
Heavy Assistance → Medium Assistance → Light Assistance → Negatives → Unassisted Pull Ups
Rather than focusing only on band color, pay attention to your actual performance: range of motion, control, repetitions and how much assistance you really need.
With consistent training, pull up bands for beginners can provide a simple bridge between being unable to complete a pull-up and performing controlled bodyweight repetitions.